Deep-Dive Series // 6 Steps

Designing a Keyboard PCB

From an empty KiCad project to files a fab house will accept

Difficulty

Intermediate

Time

A weekend

Steps

6 stages

Every file for this build is up on GitHub, the plates, the case and the firmware

Our GitHub

Before You Build

Gather everything below before you start and the whole build goes a lot smoother. The printable parts are on GitHub, so you only need to buy the hardware.

Component Manifest

Component Qty Specification
KiCad 1 Free and open source, on Windows, macOS and Linux
Your layout 1 Sketch it on keyboard-layout-editor.com first
MX switch footprints The MX_Alps_Hybrid library covers almost everything
1N4148 diodes 1 per key Unless you are building a tiny diodeless grid

Tools Required

01

KiCad 7 or newer

02

A Gerber viewer (KiCad has one built in)

03

A fab house account when you are ready to order

Build Steps

Work through these in order. Anything you need to download along the way, the plates, the case and the firmware, is already waiting for you on GitHub.

01

Step 1 of 6

Start smaller than you think

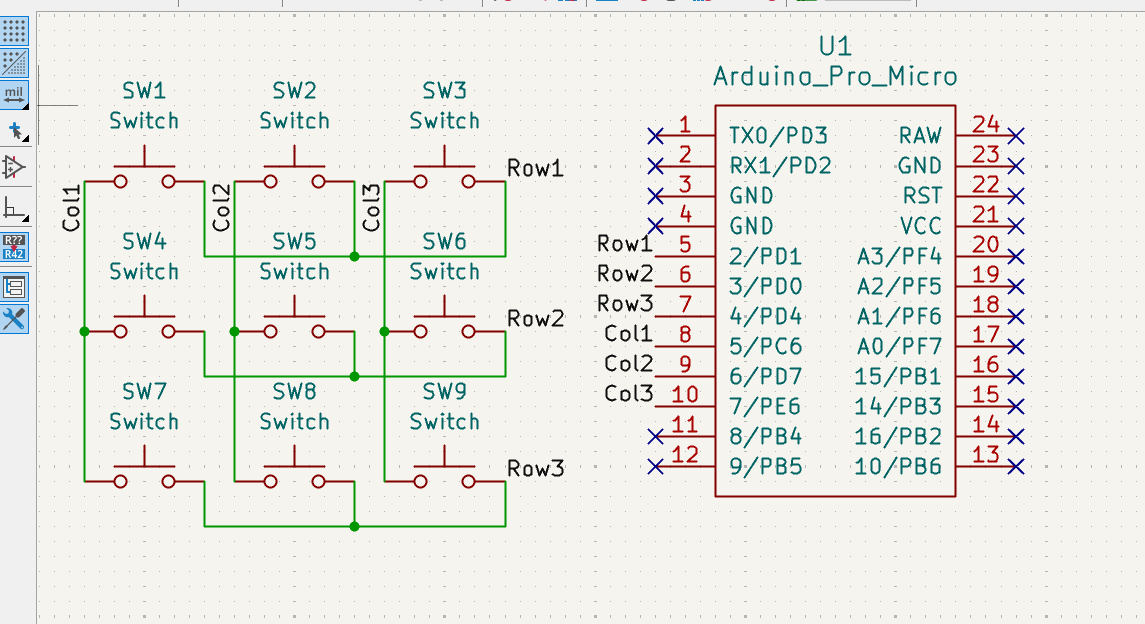
We would genuinely recommend your first board be tiny. The MonkiiPad3x3 is nine switches and a Pro Micro, and that is the whole schematic, so you can see all of it on one screen while you learn where the tools live. Get nine keys right and sixty is the same work repeated, not a harder problem.
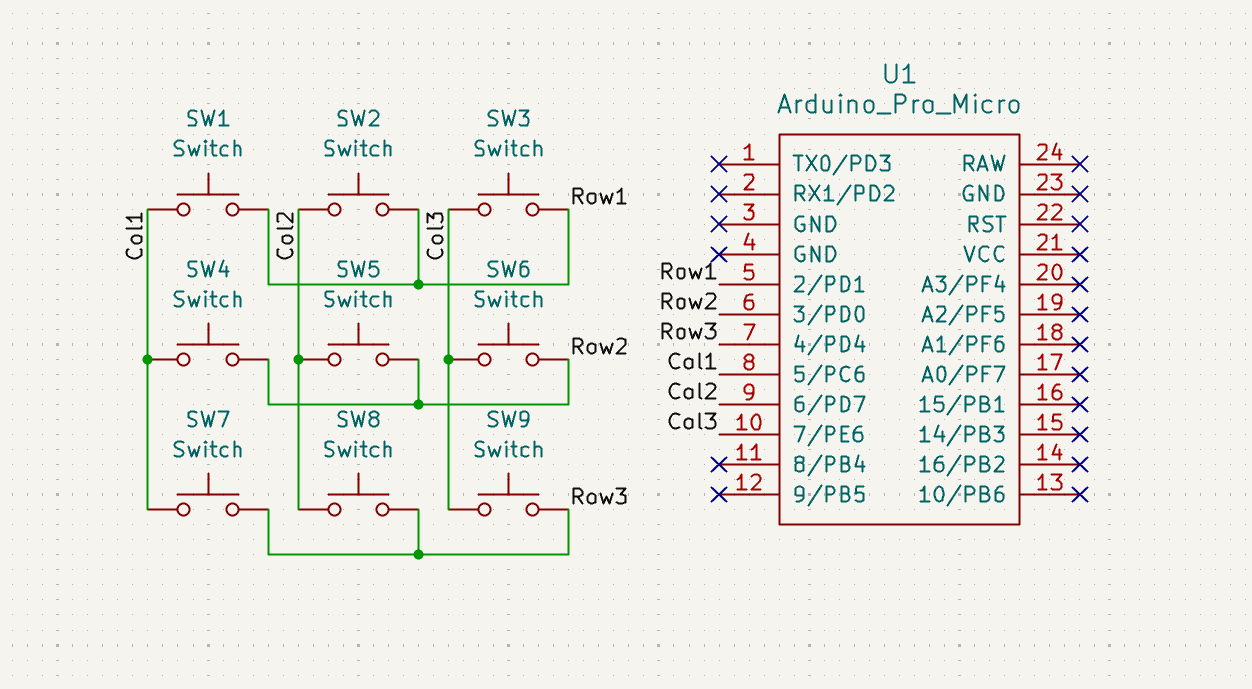
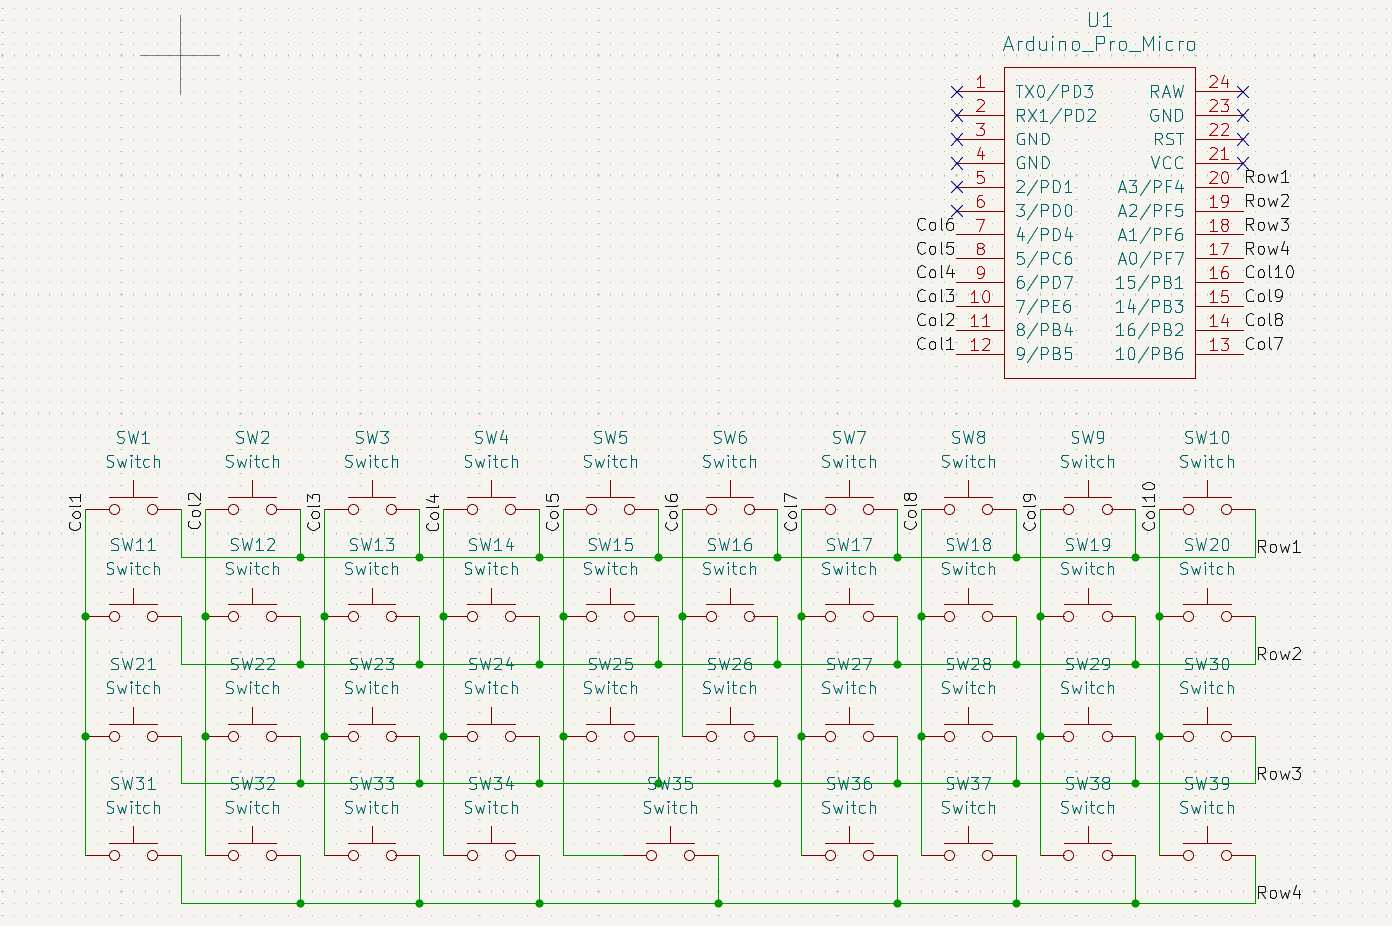
Start smaller than you think
Step 1, Start smaller than you think

02

Step 2 of 6

Set the project up once

Make a new KiCad project and open the schematic editor. Before placing anything, check the Device, Connector, Switch and power libraries are loaded, then drop your power symbols on the sheet: 3V3, a few GNDs, and a PWR_FLAG on each rail. Those flags do nothing electrically, they just stop the checker complaining that your power has no source.

Pro Tip

Save with Ctrl+S constantly. KiCad is stable, but an hour of matrix work is not something you want to redraw.

Set the project up once
Step 2, Set the project up once

03

Step 3 of 6

Wire the schematic with net labels

Place your microcontroller, then label every pin you plan to use: ROW0, COL3, SDA. Now draw one switch with its diode, label the diode ROW0 and the switch COL0, and copy-paste that pair for every key. Two pins sharing a label are connected, so you never drag a wire across the page.

Pro Tip

Keep all diodes facing the same direction, cathode toward the row. Mixed-up diodes are the most common reason a finished board has dead keys.

Wire the schematic with net labels
Step 3, Wire the schematic with net labels

04

Step 4 of 6

Give every part a footprint

A schematic symbol is only a drawing, so next you tell KiCad what each part physically is. Open Tools → Assign Footprints and work down the list. We use MX_Alps_Hybrid:MX-1U-NoLED for switches, and through-hole diodes are far easier to hand-solder on a first board. Take your time: a wrong footprint is a board that will not fit its parts.

Give every part a footprint
Step 4, Give every part a footprint

05

Step 5 of 6

Lay out the board

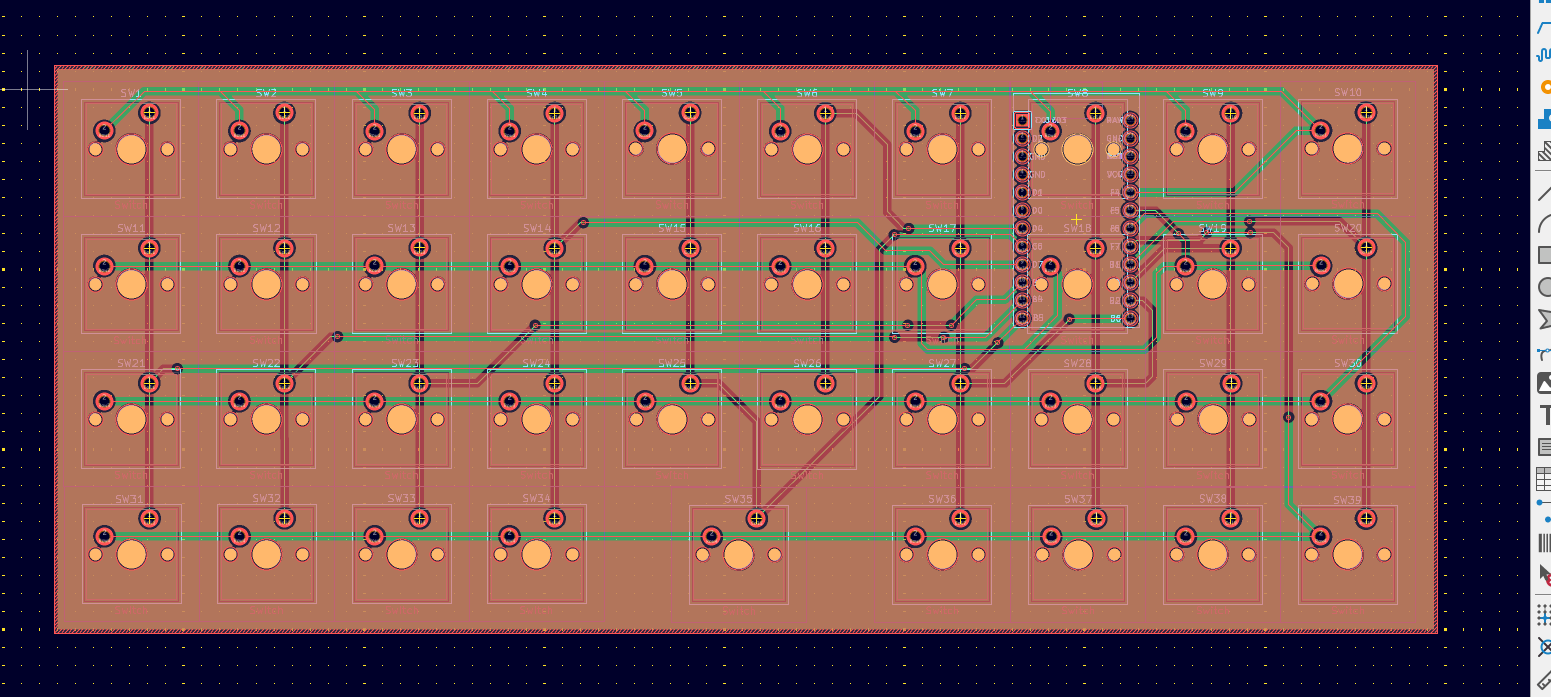
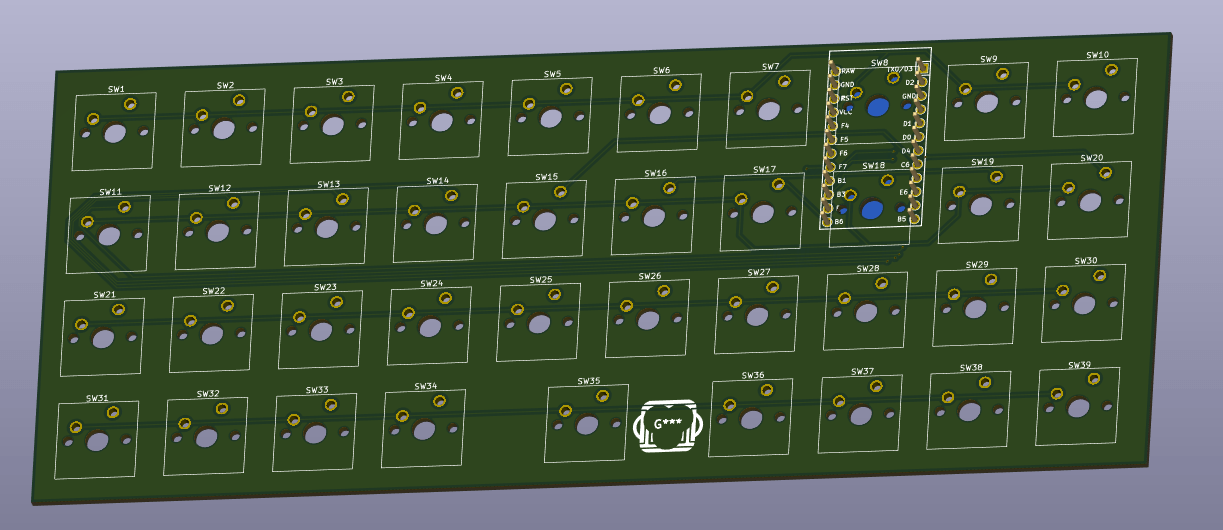
Export the netlist, import it in the PCB editor, and every part appears in a pile with thin lines showing what connects where. Place the switches first on a 19.05mm grid so they match real keycaps, then fit everything around them. Route the tracks, pour a ground plane on the back, add mounting holes. It looks chaotic for twenty minutes and then suddenly looks like a keyboard.

Pro Tip

The 3D viewer (Alt+3) is the fastest way to spot something in the wrong place. Use it often.

Lay out the board
Step 5, Lay out the board

06

Step 6 of 6

Check it, then order it

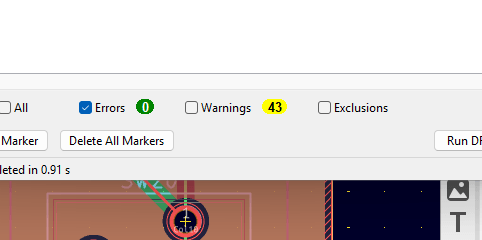
Run ERC and DRC and clear every error. When both are clean, export Gerbers and a drill file, zip them, and open the zip in a viewer before uploading anywhere. Most fabs will make a small board for a few dollars, but the wait is weeks, so it is worth being certain. Our schematics, board files and DRC output are on GitHub to compare against.

Pro Tip

Order two or three. The price barely changes and it means a soldering mistake is not the end of the project.

Check it, then order it
Step 6, Check it, then order it

Join the Discussion

Stuck on a step, got a tip, or just finished your build? Drop it in our form. We read every single one and it helps us make the guide better.

Leave a Comment →